The only way to get better at art quilting is to practice. We hear that time and again. What we don’t always necessarily hear how to practice. One method, is the the graduated practice technique. This process starts with a smaller exercises, and rounds out with a more challenging project that will combine the skills you’ve learned. This is the process I have developed over my years of quilting and I find that it really takes away the “scary” part of learning new quilting methods.
Stage One: Get it down on paper!
Drawing on paper is one of the most cost effective ways to practice your quilting. Paper is cheap and can be brought pretty much anywhere with you. I have a sketchbook specifically just for practicing new fillers.
Here are some practice pages you can print out to get you started.
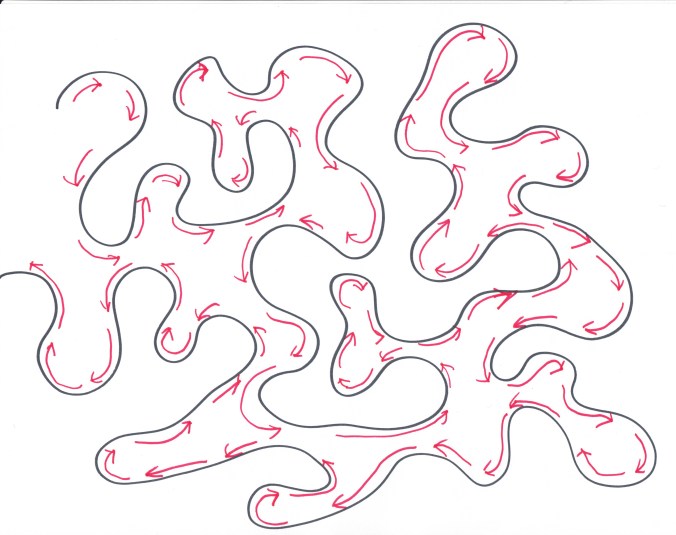
1 Stippling
2 Pebbling

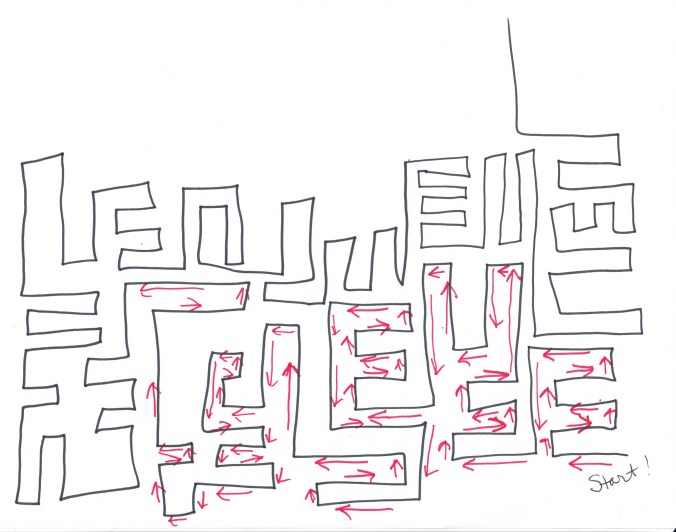
3 Maze
4 Shells
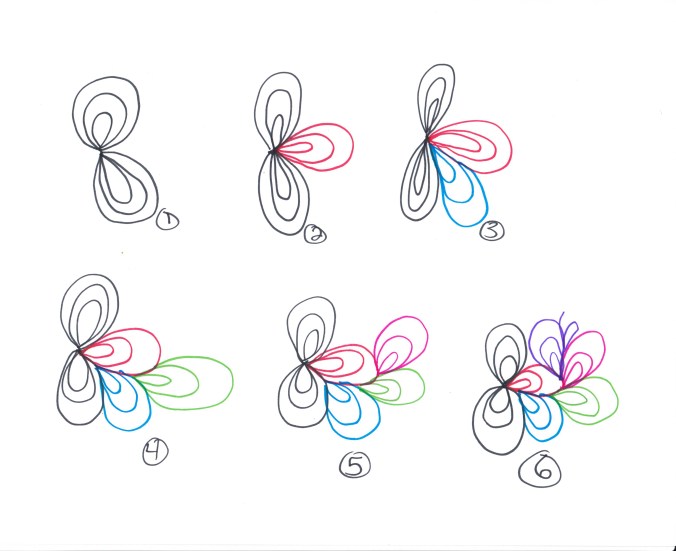
5 Feathers

Stage Two: Small Scale Practice

Coasters are a great way to practice free motion fillers. It doesn’t take much time, and you can use scraps from other projects.
Materials Needed:
8 Small fabric scraps at least 5×5”
4 Batting scraps also at least 5×5”
Threads of your choice
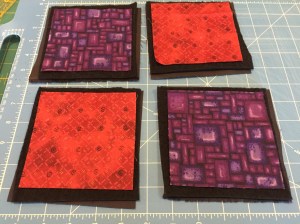
Make four quilt sandwiches. If you wish you may spray bind them, however they are small enough to not really need basting at all.
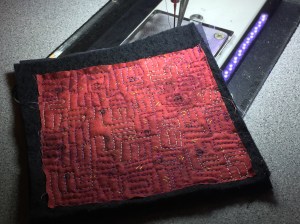
Coaster 1: Stippling

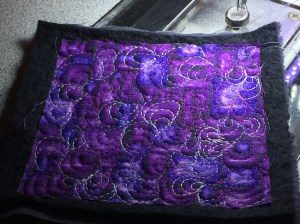
Coaster 2: Pebbling

Coaster 3: Maze
Coaster 4: Shells
Stage Three: Making Spaces
Pet Beds! Many animal shelters accept donations of 12×18” pet beds/pads, those kennel floors can be cold and uncomfortable. Everyone benefits from your quilt practice in this scenario; you get the practice and the knowledge you brought comfort to a animal waiting for a forever home and the animal gets a soft cozy place to sleep and feel safe on. Bonus? They don’t care how bad OR good your quilting is!

Materials Needed:
Fabric or orphaned quilt blocks sewn together into a 12×18” rectangle
Backing fabric (single or pieced) 12×18
Batting 12×18
Threads of your choice
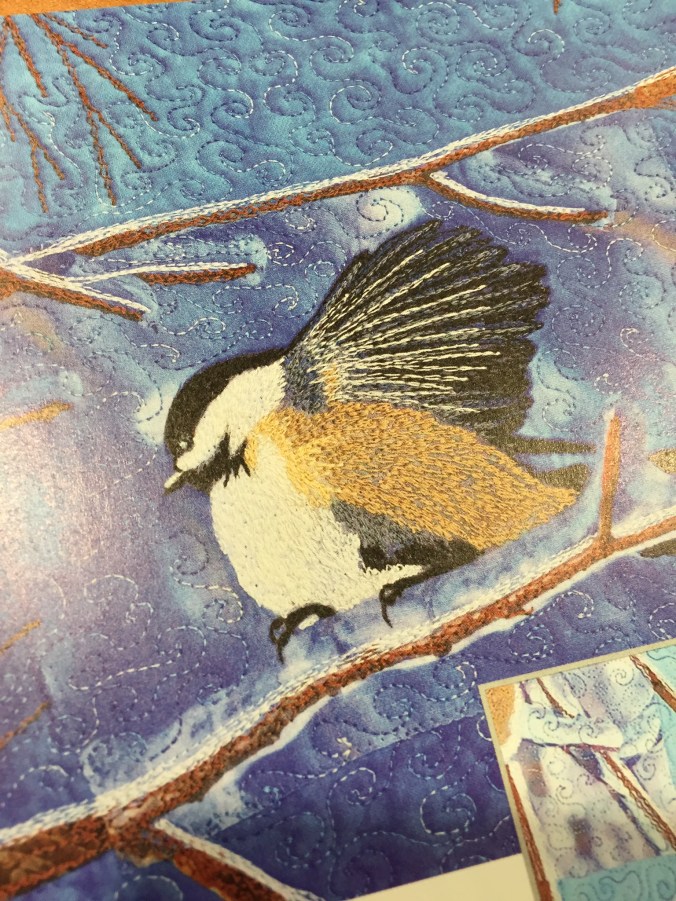
Take your top fabric; draw three lines with a chalk pencil or your preferred marking pen. Draw three (or more lines if you wish) as shown.


Next, draw out your feathers. I have found until you are comfortable with process of quilting the feathers after some experience, it’s helpful to mark the feathers first and just follow your own line. Try and fatten up your feathers to fill in the space evenly and nicely.
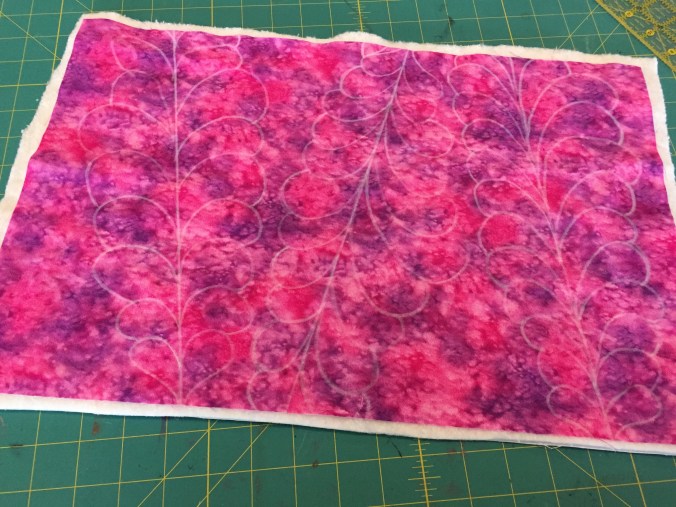
Layer your top, batting and backing together in a quilt sandwich; again, if you feel more comfortable with it basted go ahead and pin or spray baste at this time.
Simply quilt your feathers then bind using your favorite binding method. Make a bunch of them and donate them to your closest animal shelter. This is also a great way to use up fat quarters you may have stockpiled.


Stage Four: Putting It All Together
Materials Needed:
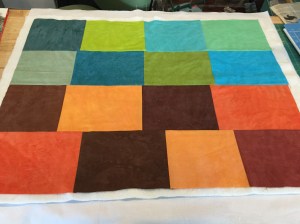
Quilted Top: Sew scrap squares/rectangles together until piece measures at least 21” x 28”.
Quilted Backing: Fabric 25” x 32”
Batting: 25” x 32”
Back of Pillow Sham: 2 18” x 21” pieces of a fabric that matches
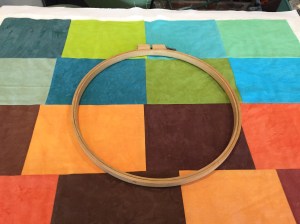
Take your scrap pieced top, and using an embroidery hoop or plate places in the center, trace with chalk pen/marking pen
Draw a diagonal line from corner to corner, each way as shown (including through center)

Draw your feathers on starting on the inside, then drawing the outer feathers:


Quilt the circle line first; then quilt the feathers
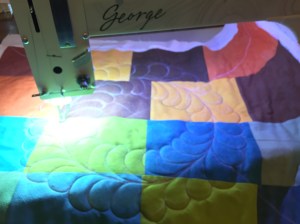
Forgive the bluriness!
Quit alone the diagonal lines.
You now have 4 quadrants made from the diagonally drawn lines. Use each filler you learned during the coasters quilting, to fill out those four spaces.
Once quilted, trim to 28” x 21”
Pillow shame case construction:
On each 18” 21” piece that you cut turn 1” and press on one 21” side, turn under 1” again and press. Take to your machine and stitch turned edge in place.

Place the turned edges pieces you’ve just sewn, right sides down on to the right side of your quilted piece, the hemmed edged will overlap around 4” in the center.


Pin all the way around:

Sewing all the way around the rectangle.

Turn right side out and your case is ready for a pillow!


 …and that’s just what it’ll do…


 Awhile back, there was a discussion that cropped up on men in the quilt world, sparked by a podcast with